
Order Preferences
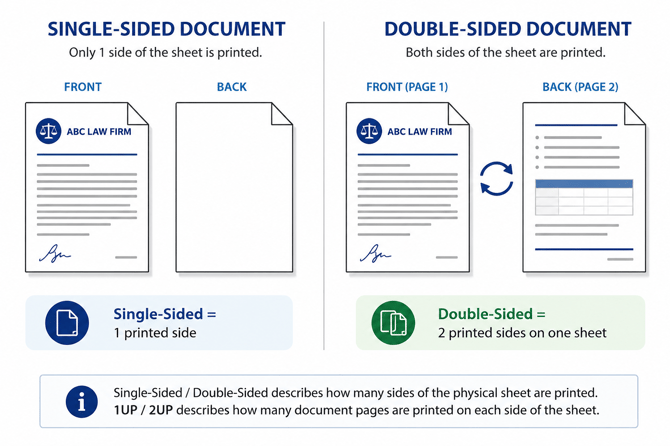
- Sides: Choose One-sided (print on one side of the sheet of paper), or Double-sided (print on both sides of the sheet of paper).
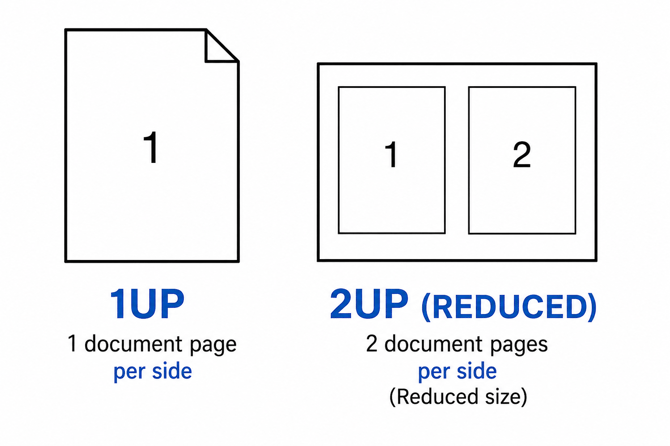
- Format: Choose 1up or 2up.
- If you’ve already reduced your documents, please do not choose 2UP. Only select this option if you would like us to reduce your documents for you.
- Service: Choose Normal or Rush
- Return Envelope: Check Include #9 Return Envelope if you want a return envelope included with the mailing.
- Under Select Address, choose the return address to use for this job.
- Click Add New Address if you need to use an address that isn't already saved.
See "Customize Default Fields" for how to manage saved return addresses.
Certificate of Service- Check Include Certificate of Service if you want a Certificate of Service prepared for this job.
- Under Select Signature, choose the signature block to use.
- Click Add New Signature if you need to use a signature block that isn't already saved.
Under Preferences, you can also choose to:
- Attach Document(s): Attach the documents you uploaded to the Certificate of Service PDF sent back via email at completion of the job.
- Include NEF Recipients: We can pull the list of Electronically Noticed Recipients and add it as an additional page on the Certificate of Service PDF sent via email at completion of the job. There is a small charge for this service, which is a pass through cost from PACER.
- Custom File Name: Choose a specific name for the PDF Certificate of Service sent via email at completion of the job.